Table of Contents
- What You'll Need Before Inspecting
- How to Inspect a Used Car Engine
- Check for Fluid Leaks and Corrosion
- Evaluate Tires and Suspension
- Review Dashboard Warning Lights and Electronics
- Used Car Pre-Purchase Inspection Checklist
- Used Car Test Drive Checklist
- When to Get a Used Car Inspection by a Mechanic
- How to Interpret Inspection Findings and Make Your Decision
- Common Mistakes to Avoid During Inspection
- Frequently Asked Questions
Last Updated: October 18, 2026
What You'll Need Before Inspecting
Before you check used car mechanical condition, gather a few tools.
Bring a flashlight to see fluid levels, hose cracks, and corrosion, plus a notebook to track findings. Wear clothes you don't mind getting dirty.
A thorough inspection takes 20-30 minutes; rushing means missing warning signs.
Ask the seller for maintenance records first. They show whether the car received regular oil changes and repairs; a spotty history is a red flag.
Consider bringing a friend who knows cars for a second set of eyes. If you lack mechanical confidence, professional inspections exist, which we'll cover later.
How to Inspect a Used Car Engine
The engine is where most mechanical problems hide, and a visual inspection reveals how well it was maintained.
Start with the engine cold, never hot, or you can burn yourself. Heavy grime can hide leaks.
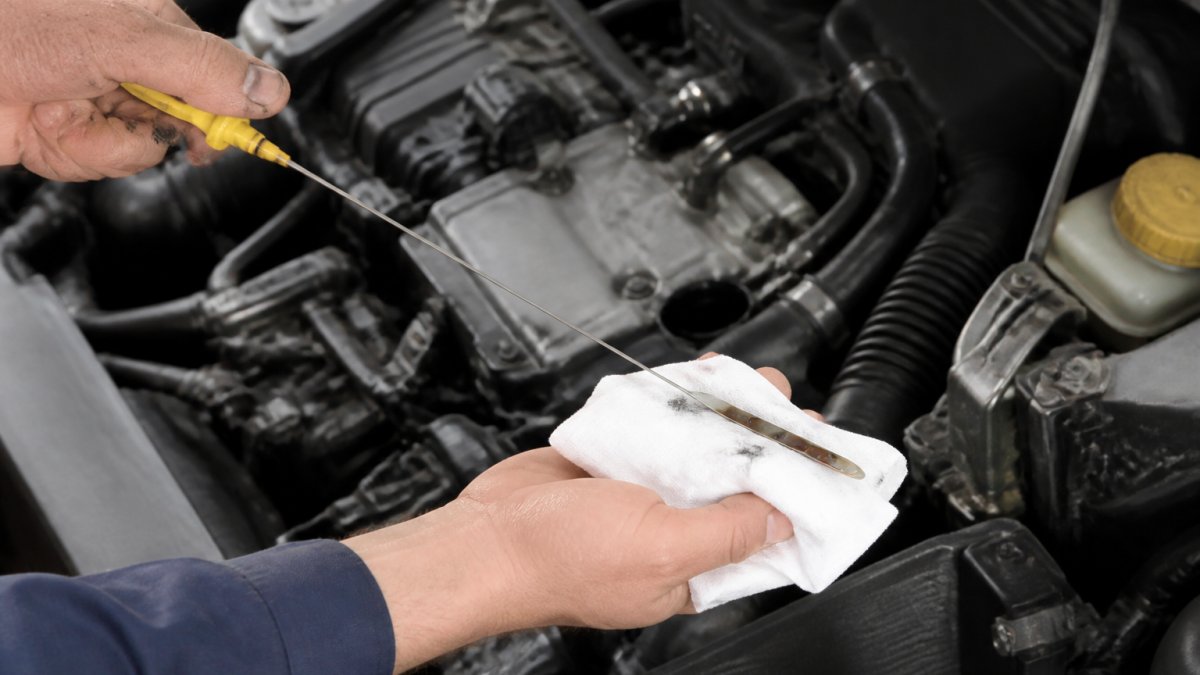 Mechanic's hands checking the engine oil dipstick on a used car engine, showing the fluid level clearly against the bright yellow dipstick markings
Check Engine Oil Condition and Level
Dirty or low engine oil means trouble ahead.
Pull the dipstick, wipe it, reinsert it fully, then pull it again. Oil should reach the "full" mark; below the minimum line means the engine is burning or leaking oil.
Fresh oil is amber or light brown; dark brown or black means it's overdue for a change, and gritty oil signals neglect. Don't buy a car with severely dirty oil.
Smell the oil: a burnt smell means the engine runs too hot or oil is breaking down.
Examine Belts, Hoses, and Gaskets
Belts and hoses wear out, and a single failure can leave you stranded.
The serpentine belt should be smooth with no cracks or fraying. Squeeze the hoses gently: they should feel firm, and a spongy hose is deteriorating.
Check for leaks around gaskets, especially where the engine block meets the cylinder head. Small weeps are common on older cars; heavy leaks are not.
Assess Coolant and Brake Fluid
Your cooling system keeps the engine from overheating. The brake fluid stops your car.
Find the coolant reservoir (usually a translucent plastic tank). The level should sit between the minimum and maximum lines; if low, the system has a leak. Brown or rusty coolant suggests internal corrosion.
The brake fluid reservoir is usually a smaller plastic tank near the back of the engine compartment. Fluid should be clear to light amber; dark or cloudy fluid means moisture contamination that reduces braking.
Check for Fluid Leaks and Corrosion
Leaks are expensive: a small drip today becomes a major repair tomorrow.
Look at the pavement where the car was parked. Oil is dark brown or black, coolant is bright colored, and transmission fluid is red or pink.
Trace any spots to their source: a single drop might be nothing, but a puddle means a real leak.
Check the undercarriage, suspension, and brake lines for corrosion. Surface rust is normal, but deep pitting or flaking rust is a problem, and rust on brake lines is especially serious because it compromises stopping power.
White or green crusty deposits on the engine block and transmission case indicate the cooling system has been leaking for a while.
Evaluate Tires and Suspension
Tires reveal how the car was driven and maintained. Suspension problems affect safety and comfort.
Tread depth should be at least 4/32 of an inch (about 3 millimeters). Use the penny test: insert a penny with Lincoln's head upside down, and if you can see the top of his head, tread is too shallow. Uneven wear suggests alignment or suspension problems.
Look for bulges, cracks, or missing chunks, which are safety hazards. Check the sidewall date code (2618 means the 26th week of 2018); tires older than 10 years should be replaced regardless of tread depth.
Bounce each corner: the suspension should compress smoothly and return without excessive bouncing, which means worn shocks or struts. Creaks or clunks suggest worn bushings or ball joints.
Review Dashboard Warning Lights and Electronics
The dashboard is the car's primary self-diagnostic tool. This section covers warning lights, diagnostic scans, and electronic feature tests to separate minor annoyances from expensive faults.
Warning Lights: What They Mean and When to Worry
Turn the ignition to On without starting the engine: most warning lights should illuminate briefly as a bulb check, then go out. Start the engine and watch again; any light that stays on should not be ignored.
- Check engine light (CEL): The engine computer has detected a fault. A steady light is less urgent than a flashing light. A flashing CEL indicates a misfire that can damage the catalytic converter, stop driving and seek service.
- Oil pressure warning: Low oil pressure can cause rapid engine damage. If it stays on after start, shut the engine off and investigate before driving.
- Coolant temperature warning: Overheating can warp the cylinder head or blow a head gasket. Do not drive if this light stays on.
- Battery/charging warning: The charging system is not maintaining voltage. You may have a failing alternator or battery, and the car may stall or leave you stranded.
- Brake warning light: Could indicate low brake fluid, a parking brake left on, or a hydraulic fault. Treat it as safety-critical until diagnosed.
- ABS and traction control lights: The anti-lock braking or stability system has a fault. Braking may still work, but emergency stopping performance could be reduced.
- Airbag/SRS light: The supplemental restraint system has a fault. Airbags may not deploy in a crash.
- Tire pressure monitoring system (TPMS) light: One or more tires is low or the sensor has failed. Check tire pressures and inspect for punctures.
If multiple lights are on at once, or if the CEL is flashing, treat the car as having a serious electronic or mechanical fault until a professional diagnoses it.
Diagnostic Scans and Trouble Codes
An OBD-II scanner plugs into the data link connector under the dashboard near the steering column and reads trouble codes stored by the engine and transmission computers. Many auto parts stores scan codes free, or you can buy a basic Bluetooth scanner and use a smartphone app.
Ask whether the battery was disconnected or codes cleared recently, since clearing codes can temporarily hide an active problem. If the seller refuses a scan or the scanner cannot communicate with the vehicle, that is a red flag.
Record the codes and look up their meaning. P0xxx codes are generic powertrain codes and P1xxx codes are manufacturer-specific. An oxygen sensor or evaporative emissions code may be a moderate repair, while misfire, transmission solenoid, or communication faults can be more serious. A scan doesn't replace a mechanic's diagnosis but gives you concrete information to negotiate with.
Testing Electronic Features
Test each electronic feature with the engine running and, where relevant, in motion.
- Air conditioning and climate control: Turn the A/C to maximum cold and check that the air blows cold within a minute or two. Listen for unusual compressor noises and check that all fan speeds work. A weak or warm A/C can mean a refrigerant leak or a failing compressor.
- Infotainment and connectivity: Test the touchscreen, radio, Bluetooth pairing, USB ports, and navigation if equipped. Check that the backup camera and parking sensors activate when reversing.
- Driver-assistance systems: If the car has adaptive cruise control, lane-keeping assist, blind-spot monitoring, or automatic emergency braking, confirm the systems power on and show no fault messages. Some systems require specific road conditions to test fully; a fault message on the cluster is a warning sign.
- Power accessories: Test all windows, door locks, mirrors, seats, and the sunroof. Run each through its full range of motion. A slow or stuck window regulator or seat motor is a repair cost.
- Lighting: Check headlights (low and high beam), turn signals, brake lights, reverse lights, and interior lights. Ask a helper to watch the exterior lights while you operate the controls.
- Heated features: If equipped, test heated seats, heated steering wheel, and rear defroster. These are common failure points on older cars.
Listening to the Engine at Idle
With the engine warm and idling, listen for smooth, steady operation. A rough idle, surging, or stumble can indicate spark plug, ignition coil, vacuum leak, or fuel injector problems. Rev gently and listen for knocking, ticking, or exhaust leaks; a metallic rattle under light revs can point to a loose heat shield or internal wear.
On a digital dashboard, scroll the menus for stored messages or service reminders; some vehicles log faults that never trigger a warning light, and a scan tool can retrieve them.
Used Car Pre-Purchase Inspection Checklist
Use this checklist to organize your inspection findings:
| Item | Condition | Notes |
|---|---|---|
| Engine oil level | Full / Low / Critical | Color and smell? |
| Engine oil color | Light / Dark / Very dark | Maintenance indicator |
| Coolant level | Full / Low | Color and clarity? |
| Brake fluid | Clear / Dark / Cloudy | Safety concern if dark |
| Serpentine belt | Good / Cracked / Worn | Replacement cost? |
| Hoses | Firm / Soft / Mushy | Check all connections |
| Visible leaks | None / Minor / Severe | Identify source |
| Corrosion | None / Surface / Deep | Location and severity |
| Tire tread depth | Good / Adequate / Low | Penny test result |
| Tire wear pattern | Even / Uneven | Alignment issue? |
| Suspension bounce | Normal / Excessive | Shock absorber wear? |
| Dashboard lights | All off / One on / Multiple | Note which lights |
| Engine idle | Smooth / Rough | Hesitation or knocking? |
Used Car Test Drive Checklist
The test drive is your best chance to feel how the car behaves under load, at speed, and during everyday maneuvers. Use this checklist to evaluate the vehicle in stages, and bring a notebook.
Make sure the seller provides valid registration and insurance, and confirm you are legally allowed to drive. Plan a route with quiet residential streets, rough pavement, a hill, and a highway on-ramp if safe and legal, aiming for at least 15-20 minutes of mixed driving.
Cold Start and Idle
Start the engine cold, before the seller warms it up, and listen for ticking, tapping, or a rhythmic knock. A brief cold-start rattle from the timing chain area can be normal, but persistent knocking or a loud tick that doesn't fade is a warning sign. Most warning lights should extinguish within seconds; if the check engine light stays on, ask for a diagnostic scan before driving further.
In Park or Neutral with your foot on the brake, rev gently to about 2,000-2,500 rpm and hold briefly. The engine should respond smoothly without hesitation, misfire, or a strong fuel smell; a rough idle can point to spark plug, ignition coil, vacuum leak, or fuel injector issues.
Braking Performance
On a safe, empty stretch of road, apply the brakes firmly at low speed. The pedal should feel firm and consistent, not spongy or low; one that sinks toward the floor suggests a hydraulic problem or air in the lines. Listen for grinding (worn pads or rotors), squealing (wear indicator), or pulsation (warped rotors).
If safe and legal, perform a controlled stop from about 50 km/h; the car should stop straight without pulling, which can indicate a sticking caliper, collapsed brake hose, or uneven pad wear. Afterward, check for a burning smell that could point to a dragging brake.
Steering and Suspension
In an empty parking lot, turn the wheel fully left and right and listen for clicking or popping from the front axle. A light click on tight turns can be normal on some front-wheel-drive cars, but loud, repeated clicking suggests worn constant-velocity (CV) joints. Feel for binding, uneven effort, or poor return to center.
Drive over rough pavement at moderate speed; the suspension should absorb bumps without excessive bouncing, crashing, or clunking. After stopping, push down on each corner: the body should return to level within one or two rebounds, and continued bouncing suggests worn shocks or struts. Squeaks, creaks, or rattles over bumps can indicate worn bushings, sway bar links, or ball joints.
Transmission and Drivetrain
In an automatic, accelerate gently then moderately from a stop. Shifts should be smooth and timely, without hesitation, flaring (rpm rising without acceleration), or harsh engagement. In a manual or selectable mode, cycle through the gears and note slipping, grinding, or delayed engagement; a transmission that slips or shudders under light acceleration is a costly red flag.
On a safe, straight road, accelerate to about 80 km/h and hold steady. A whine that rises and falls with speed can indicate differential or wheel bearing wear, while vibration through the wheel or seat at highway speed can point to tire balance, wheel bearing, or alignment issues.
Highway and Merge Behavior
If safe and legal, merge onto a highway and accelerate to speed. The car should track straight without constant correction; pulling to one side can indicate alignment problems, tire pressure differences, or a dragging brake. Listen for wind noise, exhaust leaks, or engine pinging under load, which can be caused by low-octane fuel, carbon buildup, or incorrect ignition timing.
Hold highway speed for a few minutes and note vibrations, shudders, or noises that only appear at speed; a vibration that worsens with speed often points to tire or driveline balance issues. After exiting, stop safely and check for new fluid drips.
Post-Drive Checks
After the drive, leave the engine running and open the hood. Listen for unusual idle noises and check for smoke or steam, then look under the car for fresh drips. Turn the engine off, wait a few minutes, and recheck oil and coolant; a low reading after a short drive can indicate a leak or consumption problem.
Record each observation as normal, monitor, or concern to help compare cars and negotiate. If any safety-critical issue appears, braking, steering, or a warning light that stays on, stop the test drive and seek a professional inspection.
When to Get a Used Car Inspection by a Mechanic
Sometimes a DIY inspection isn't enough. A professional mechanic sees things you can't.
Get a professional inspection if you lack mechanical knowledge. A mechanic can identify problems that aren't visible during a basic inspection and run a diagnostic scan to read stored trouble codes.
A pre-purchase inspection typically includes a thorough check used car mechanical condition assessment covering the engine, transmission, suspension, brakes, electrical system, and undercarriage, plus a diagnostic scan and written report.
Ask to take the car to a mechanic of your choice. Most honest sellers agree; a refusal is a warning sign that the seller has something to hide.
Get the report in writing: a good mechanic lists all findings, notes each issue's severity, and estimates repair costs. Use it to negotiate the price or walk away if problems are too severe.
How to Interpret Inspection Findings and Make Your Decision
Not every problem means you should reject the car: some issues are minor and cheap to fix, others serious and expensive.
Minor issues include worn brake pads (normal wear), an air filter replacement, or a burned-out bulb, maintenance items, not mechanical failures. Budget $100-$500.
Moderate issues include worn suspension bushings, a leaking water pump, or a transmission fluid leak. These need repair but aren't emergencies. Budget $500-$2,000.
Serious issues include a failing transmission, engine knock (internal damage), or severe corrosion affecting structural integrity. These are expensive and risky, and the car may not be worth buying unless the price reflects the repair costs.
Consider age and mileage: a 10-year-old car with 200,000 kilometers will have more wear than a 5-year-old with 100,000, so scrutinize high-mileage cars more closely.
Ask yourself: Can I afford the repairs? Do I trust this car's reliability? Will the payment plus repair costs fit my budget? If you answer no to any, walk away, there are other cars.
Common Mistakes to Avoid During Inspection
Many buyers make the same errors when inspecting a used car.
Don't inspect a hot engine. Wait at least 30 minutes after driving; a hot engine is dangerous and can hide problems because leaks stop flowing when warm.
Don't rely only on the odometer, since mileage can be rolled back (though it's illegal). Judge interior and exterior condition to estimate true age and use; an 80,000-kilometer car that looks beat up may have been driven hard.
Don't ignore warning lights. A check engine light means the engine computer detected a fault, and you need a diagnostic scan to know what it is.
Don't skip the test drive; some problems only appear when the engine is under load or at highway speeds.
Don't negotiate based only on your own inspection. Get a professional inspection too, since a mechanic's report carries more weight; use both to decide.
Don't buy on emotion. It's easy to fall in love with a car's appearance and overlook mechanical problems; a pretty car with a bad engine is still a bad deal.
Buying a used car is a big decision. At Variety Auto, we understand the importance of knowing exactly what you're getting. That's why we recommend every buyer perform a thorough check of used car mechanical condition before committing to a purchase. When you're ready to explore our quality used vehicle inventory and discuss financing options that work for your budget, visit Variety Auto's online inventory to see our current selection and get started with a simplified application process.
Frequently Asked Questions
What should you check on a used car before buying?
Start with a thorough engine compartment inspection: check oil condition, coolant, brake fluid levels, and look for leaks or corrosion. Examine belts, hoses, and gaskets for cracks or wear. Review all dashboard warning lights, test the electronics, and inspect tires for uneven wear or damage. Take a test drive to assess overall performance, and always review the vehicle's maintenance records. Consider a professional mechanic inspection for peace of mind before making your purchase decision.
How do you check a used car's engine before buying?
With the engine cold, open the hood and examine the engine compartment for visible damage, rust, or corrosion. Check the oil dipstick to assess oil level and condition, dark, dirty oil suggests poor maintenance. Inspect coolant and brake fluid levels in their reservoirs. Look at belts and hoses for cracks, fraying, or leaks. Start the engine and listen for unusual noises. Check for fluid leaks under the vehicle. These steps reveal the engine's mechanical condition and maintenance history.
Should you get a mechanic to inspect a used car before buying?
Yes, a professional mechanic inspection is strongly recommended before purchasing a used car. While a DIY visual check reveals obvious issues, a mechanic uses diagnostic equipment to detect hidden mechanical problems, transmission condition, electrical faults, and safety concerns you may miss. This inspection can save thousands by preventing a costly purchase mistake. Many sellers cooperate with independent inspections, and the findings give you confidence in your purchase decision.
What are signs of transmission problems in a used car?
During a test drive, watch for hesitation or delay when shifting gears, rough or jerky acceleration, and slipping (engine revving without matching wheel speed). Listen for grinding or whining noises. Check for transmission fluid leaks under the vehicle, the fluid is typically red or pink. Smell the dipstick; burnt odor indicates overheating or internal wear. An automatic transmission should shift smoothly without clunking. If you notice any of these signs, have a mechanic perform a diagnostic scan to assess transmission health before proceeding.